So you want to start a brewery…
Anyone who expresses this ambition must invariably be prepared to answer the question: have you ever brewed beer?
Years ago, I attempted brewing beer using a beer bag — a cloth sack lined with a plastic bladder containing the ingredients. “Just add water, wait and enjoy,” the product info promised. The beer was undrinkable. I didn’t add much experience or effort to the beer and its poor quality reflected this. I’ve since learned more about brewing and understand reasons why my first attempt failed.
To prove that I could adequately replicate the brewing process, I recently brewed a second batch of beer. I was concerned with quality brewing practices and variables, prioritizing the important ones. Using a one gallon brewing kit, I attempted to brew an acceptable batch with malted grain and hops. Even with my new knowledge and diligence, I encountered an unexpected problem which gave me more insight into the brewing process as well as problem-solving in general. The value of my brewing experience was more than the beer.
The Beer Adventure
I met fellow travelers in my brewing quest. I learned of More Beer, a local homebrew store in Los Altos, CA. I visited and found a mash in progress outside the shop. Jameson, a salesperson and brewer, had hands-on experience. He answered questions about yeast and equipment, confirming and suggesting requirements for a successful brew. The store was a good place to see ingredients and gear. I captured some initial impressions on video.
The first tenet of good brewing is cleaning and sanitation. Consider that brewing is a process of controlled spoilage. Water is a petri dish for microorganisms. While boiling water will sterilize it, contamination happens easily. The process of fermentation and finishing takes weeks in conditions ideal for bacterial growth of all kinds. Any rogue yeast, bacteria, you name it, will consume the wort (the sugar-rich liquid extracted from the grain). If the byproducts of these micro-hitchhikers are unwanted, they adversely taint the beer.
Yeast is affected by temperature as it is living in the wort, consuming sugar to produce alcohol and byproducts. Without control, temperatures outside a desirable range will spur the yeast to make compounds with off-flavors. Treat your yeast well and it will be good to your beer. Wild temperature swings and extremes make for unpredictable flavors, most of which are associated with beer that doesn’t taste right.
The preparation for my brew day included a self-styled “brew box” for temperature control. My idea was to retain the heat of the fermentation process, cooling the brew as necessary with a fan that circulates air from outside the box. The box consists of rigid foam insulation glued to the outside of the brewing kit box, a removable panel and a thermal switch that connects to the brewing jug.
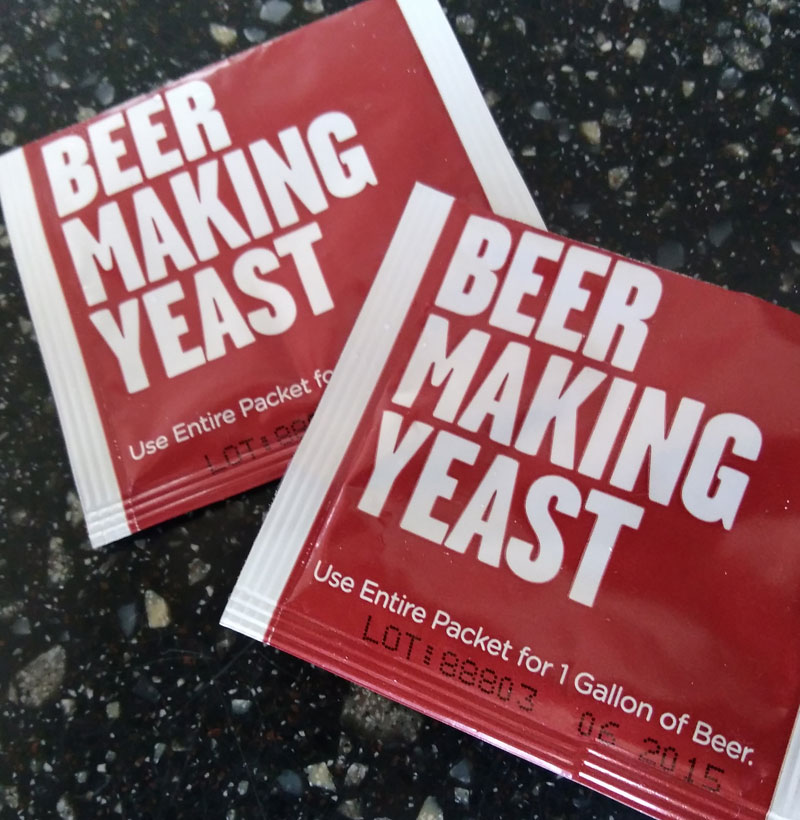
I purchased fresh yeast as the yeast in the kit was dated 2015. Another concern was water. By volume, water is the main ingredient in beer. It defines the character and expression of the other ingredients. Knowing that tap water is treated to inhibit living microorganisms, I bought 2 gallons of spring water for the brew.
The brew day started with preparation: collecting and sanitizing the tools and vessels to be used.
The Mash, the Smash and the Trainwreck
I captured some images and video, though I concentrated on brewing rather than documenting the process. The mash was as pleasant as making oatmeal with the provision that an ideal temperature range be maintained. I noticed the mash temperature rise quickly when enzymes in the malted grain were activated at a base temperature. The thermometer fluctuated wildly around my target temperature range as I adjusted the heat up and down. After an hour of cooking, I could not raise the mash to the recommended mash-out temperature of 170 degrees.
Equipment Failure _ *_ *_ Trainwreck: I discovered the glass thermometer included with the kit had a problem after I added the yeast to the boiled and cooled wort, finishing my brewing day. When I put the jug in the brew box, the digital thermometer attached to the side of the jug displayed a temperature that was much higher than the glass thermometer reading. This explained why I had a problem with the mash-out temperature. See Why a Good Thermometer Goes Bad (below) for an explanation of why the thermometer was incorrect.
In addition to other impacts of the faulty thermometer, the grain was overcooked, the sparge water was too hot and the yeast was added at a temperature that killed it. After brewing with a thermometer that missed the actual temperature by 30 or more degrees, I knew the batch of beer would be sketchy at best. However, I pressed on with the process. I decided to study the trainwreck and taste the mistakes.
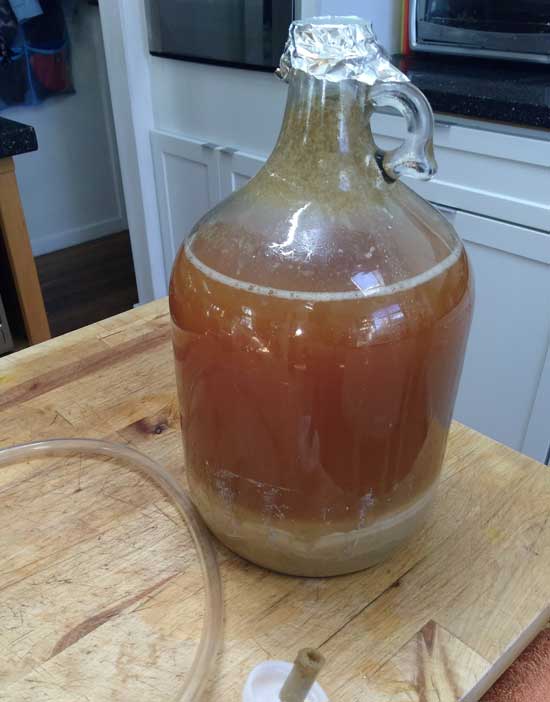
After the first day, it was clear that no fermentation was happening. No fermentation meant no alcohol, an under-intoxicating mistake. Taking precautions to avoid contamination, I added two packets of yeast from the kit and shook the bottle. While I initially avoided the yeast because of its age, I now had nothing to lose. I began to see CO2 and eventually an eruption of foam from more vigorous fermentation.
The activity of the yeast flows and then ebbs until the beer is fermented with alcohol and conditioned by time. During fermentation, the brew box was in a garage in a temperate climate. I put the brew box in the sun when the liquid was cool. With direct sunlight on the outside of the box, the liquid inside warmed to the higher end of the target fermentation temperature zone.
The failure was a necessary lesson. How did I miss checking the thermometer? I assumed the tool was accurate. With a 30 degree difference, simply looking at the resting temperature before I put it in the mash would have raised red flags. Once I was in the process, my focus narrowed on the tasks as they were time- and technique-sensitive. I focused on the lower end of the thermometer as the liquid in the top half was pushed into the upper reservoir. A lesson to beware of calibration for tools that can fail. Preparation considers where the activities of each step may become a misstep, noting the relevant tests and measures.
During the two-week wait, I was curious how bad the beer would taste. I imagined bio-chemical processes that were at work in the wort. I was confident that the beer would not be affected by contamination, but the flavor would definitely be affected by the temperature mishap as well as the fermentation conditions.
At the end of two weeks, it was time to bottle. While the yeast produces CO2 during fermentation, it is allowed to escape. The need to bottle arises if there is no equipment available for artificial carbonation (i.e. pressurized CO2 gas). The yeast in the beer consumes sugar added at bottling and produces the fizz in the beer after about 2 weeks. The timing varies as does the amount of sugar (or honey) to use.
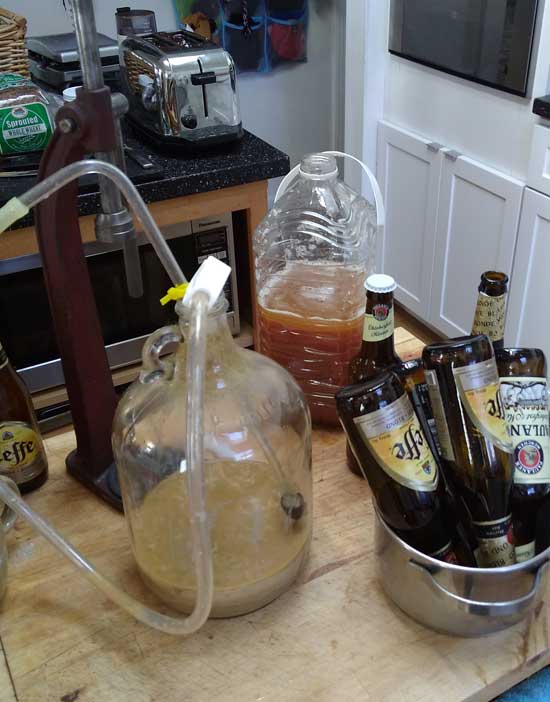
The beer was siphoned into a transfer container to avoid agitating the inactive yeast at the bottom of the fermentation jug. The transfer container is where additional sugar for carbonation is added. After gently shaking to mix, the flat beer was dispensed into bottles and capped.
What will the beer finally taste like? I’ll let you know. Stay tuned for Adventures in Beer: Part II where you’ll meet some brave men who dare to drink Trainwreck IPA.
I’m not asking you to support me in a quest for off-taste beer. The details of my not-so-successful brewing experience are presented for your review as a milestone to learning. There are many batches of beer to be made and improved upon. Thanks to all who have and continue to support Area 34 Brewing. Donate to our current crowdfunding campaign. Please contact us if you have any comments.
Why Good Thermometers Go Bad
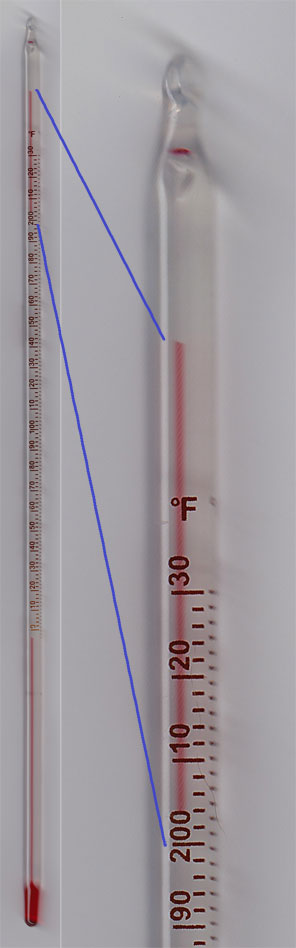
At left is the faulty thermometer used in the brewing described above. If you look at the full resolution image, you can better see the separation of the red liquid. I speculate that the alcohol has a tendency to separate if the thermometer is stored in a vulnerable position. A small amount of the alcohol is able to travel down the length of the thermometer, back-filled with air. Using a lighter flame to carefully heat the bulb can force the ends to flow back together. I bought a metal brewer’s thermometer with a dial to replace the alcohol thermometer. Cheers to temperature control!